Click here to return to the Trunk
Hardware index page
Hardware index page
Restore your antique trunk yourself rather than have us do it
Here are some Hints and procedures on how to restore an antique trunk....
1) Have a good idea what you want your trunk to look like at the end of your restoration project. Some good reading is our
Trunk Philosophy page and the Before and after page.
2) What ever way you decide to go forward, you will have to remove some parts from your trunk to clean, paint, buff, and
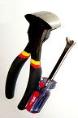
replace certain areas and parts. Some tools you are sure to need for part removal and other tasks are:
Tack Lifter Rags
End Nipper Pliers Paint Brushes
A good hammer Wire brushes
wire wheels Sandpaper
regular pliers Electric Drill
razor knife Scissors
ruler
Paint Scraper
Putty Knife
Sander
Keep in mind when removing nails that they are "clinched" over on the inside of the trunk and can be quite hard to get out. Lift
the head of the nail and pull out with the pliers. Sometimes it is best to find the "clinched" end and nip it off with pliers before
using the tack lifter to pry the head of the trunk nail up. Then the end nipper pliers can be used to pull the nail out. This will
ensure minimal wood damage as the nail comes out. Do not keep the nails, they will be replaced.
3) tin, rust and other bothersome things -
Flat and Embossed tin that is rusted can be refurbished in several ways: Wire wheels on an electric drill, Sandpaper, wire
brushes, etc. followed by steel wool. If the rust is only in small areas on flat tin and corners etc. it is best to just remove the
surface rust to a matte finished steel appearance with the above mentioned tools and paint on a clear coat to protect it.
If your tin looks like it has been submerged in water for a while you might want to consider other more drastic measures. A
product that is found in Auto parts stores called EXTEND RUST TREATMENT is useful to kill off rust and turn it into a black
paint ready surface. After treating rusty tin with EXTEND prime paint with any primer made for steel and then paint satin black.
Any flat tin that is rusted through will need to be replaced with new tin or aluminum sheet metal. Just cut to fit and nail on. After
priming and painting it will not be noticed. Embossed tin that is damaged or rusted beyond recognition can be replaced also,
however, the pattern might be hard to match.
4) wood slats -
wood slats can be stripped if painted or cleaned with furniture refinisher. In a best case scenario you can just clean with
Murphy's Oil soap , sand, and re-coat with tung oil or top coat of your choice. If you do refinish the wood slats, use an oil stain
such as Watco Danish Oil and follow with an oil based top coat. The oil based products will add oils to the wood surface and
rejuvenate the hidden patina.
5) Canvas coverings -
Canvas covered trunks originally had paint applied to make them somewhat water resistant. If you are lucky enough to have a
canvas covered trunk that has canvas still intact and repairable it can be glued back down in any areas that are loose with
common white (Elmer's) glue and weighted to clamp down flat. After being cleaned and re-glued the canvas can be repainted
or just preserved with a clear coat such as Water base polyurethane.
In the event that the canvas is too far gone to be repaired, the trunk can be stripped of all its canvas and new canvas applied
using the old canvas pieces as patterns for the new. This will require more removal of items that are on top of the canvas, (
slats, tin, metal corner clamps, etc.) Apply with Elmer's glue and after dry seal with a water based polyurethane to make the
surface more soil resistant. New canvas can also be painted a color of your choice.
6 ) Finishing Embossed tin and leather -
Embossed tin was originally painted in two colors. When restoring a trunk there are several ways to refinish the patterned tin.
1) Sandpaper or wire brush (or use paint remover) the tin down to bare metal and clear coat with Tung oil, shellac, or any
oil based sealer.
2) Sandpaper or wire brush the tin and paint with a gloss or satin black paint. After the paint is dry carefully sand the paint
off of the raised areas of the embossing to reveal the bare metal. Last, clear coat the tin to add protection from rusting.
3) Repaint in two colors to reproduce the original look of the embossing. First remove any rust or loose paint from the tin.
Prime with a good primer. Select an OIL Based paint and paint the embossed tin all over. This color will be the color of the
raised areas of the embossing. Allow at least 36 hrs to dry.
Select a color of Water based paint for the recessed areas. Before starting to paint have a container of water, kitchen cleaning
sponge, and a roll of paper towels ready. Working with a small area quickly paint the water based color over the oil based
color making sure to get the recessed areas covered completely. Wrap a paper towel around the wet and wrung out sponge.
Gently wipe over the embossed tin that you just painted and remove the color from only the raised areas. Use a light touch
and wipe the water base color off until the raised areas are completely clean and the recessed areas are still covered . I f you
do not like the way the panel turns out, use water to remove the paint and start over. Once you have the proper look to the
embossed tin, let the paint dry for 24 hrs.
A product called Oop's Latex paint remover or Goof Off can be used then to remove any troublesome areas and add final
touches. Wrap a paper towel around your finger and dampen with the Oop's liquid and rub lightly to sharpen up the detail
between the 2 colors.
4) Leather covered trunks are easy to restore if the leather is not too dried out and crumbly. Use a Saddle soap and soft
cloth to clean the leather and Neetsfoot oil to restore the suppleness and add color back to the leather. Any loose areas can be
re-glued with white glue or hide glue and weighted down to clamp tight until the glue sets. Small areas of missing leather are
best left alone as it will always look Patched if you try to add new leather to a 100 year old trunk.
7) Renailing the trunk-
The trunk should have all the existing nails tightened to make the trunk box more solid and not wobbly. To do this you will need
a good hammer, and a steel heel to hold inside the trunk where the nail came through the wood. Hammer the trunk nail from
the outside and hold the steel heel against the wood on the inside. It helps to have a helper hold things for you at times. Any
nails that are replaced have to be hammered in this way also so that the nail curls over on the inside of the trunk and is tightly
holding the handles, tin, etc. on the outside. While you are re-nailing you might as well install the new leather handles,
ornamentation, handle loops, removed corners, locks, hinges,bottom studs, etc. A steel auto body work dolly will work really
well for use as the heel to hold inside the trunk and hammer against.
8) Installing new leather handles- Usually the foot print of the old handles and caps will be visible on the side of the trunk to
use as a guide. Drill or punch 2 small holes in each end of the handle. These holes will be where nails will go through to
attach the handle to the trunk. Bend the handle into a curved shape with the ends flat against the trunk. When sure of the
correct placement nail the handle on through the holes previously drilled. The nails should go through to the inside of the trunk
at least 1/4" . Nail both handles on this way. Place a handle cap over each handle end and nail on with 3 nails each. Handle
caps are decorative only, they do not hold the handle on.
Handle loops with a pin are used with slotted handles and work similar. These pieces of hardware hold the handle on with a
pin in the hardware and handles are not nailed on.
9) Musty mothball odors, holes, gaps, etc.-
Musty odors inside a trunk are easily removed when the lining paper is removed, and the inside washed down with a solution
of detergent and water or ammonia and water. After the inside is dry, if any odor remains set the opened trunk in the sun for a
few days, after it is completely dry, seal the inside wood with shellac or similar sealer.
Gaps in the wood are caused by the wood drying out and absorbing moisture many times over the last 100 yrs. The wood
case has come into equilibrium with the cycle and the restraints of the outside tin, etc. Be very careful if you try to close the
gaps with glue and clamps to prevent undue stress on the case. Holes from loosened knots and other causes can be
patched with wood fillers and other compounds. On occasion an area of the wood will have to be replaced completely. Saw
out square and glue in a repair the same thickness as the existing wood.
10) Relining the inside
Relining of a trunk will add a clean surface to the inside and finish off the trunk for use as a blanket chest, etc. Any number of
materials can be used to reline but plain paper, decorative paper, wallpaper, fabric, and cedar paneling are the usual choices.
First scrape the old paper out with a paint scraper. It helps to wet the old paper down with a spray bottle and vinegar/water.
Next if there are any gaps running the length of the trunk, glue down a 1-1/2" strip of thin fabric material over them. Linen fabric
works well for this.
If you choose wallpaper, save yourself a lot of bother and try not to use solid vinyl paper. It is difficult to work with and because
of the many lap joints is difficult to get to stay glued in the corners. Try to reline with thin vinyl coated wallpaper or plain paper
wallpaper instead.
The procedure is: cut each piece to fit with 1/2" extra at the corners and reline: the ends - first, front and back - second,
bottom/top - last. Make sure the wood on the inside of the trunk is sealed and use white glue to paste it in.
Plain paper is my choice for relining. I use unprinted china wrapping paper and age (antique) the paper after it drys with a tea
stain. Use the same procedure as with wallpaper. A hot air blower is necessary to dry and shrink the paper to wrinkle free
condition.
You may also re-line a trunk with cloth material. When lining in cloth be sure to glue the cloth to a poster board backer first
before gluing into the trunk. Cut the poster board to size for each surface before gluing on the cloth, then glue the poster
board/cloth assembly into the trunk. Use 3M spray contact glue for this.
If you are good at wood working and don't mind the added weight of cedar try lining the trunk with cedar paneling. You can find
cedar paneling at almost any Home Improvement store in a bundle. It is the same material used to line your clothes closet.
Keep in mind that if your trunk has a tray and you reline completely in cedar, the tray will not fit any longer because the cedar
will make the trunk smaller on the inside. Find a good woodworker to reduce the size of the tray so that it fits inside your trunk
again.
Any trays should be relined completely with plain paper or fabric along with the inside of the trunk.
Remember to have fun and not to rush, give things time to dry completely before moving on to the next phase and if you just
can't seem to get it finished, we are always here to help or complete your restoration!
Gary Daniel
Shenandoah Antique Restoration Email: info@shenandoahrestoration.com
800-575-1960
Here are some Hints and procedures on how to restore an antique trunk....
1) Have a good idea what you want your trunk to look like at the end of your restoration project. Some good reading is our
Trunk Philosophy page and the Before and after page.
2) What ever way you decide to go forward, you will have to remove some parts from your trunk to clean, paint, buff, and
replace certain areas and parts. Some tools you are sure to need for part removal and other tasks are:
Tack Lifter Rags
End Nipper Pliers Paint Brushes
A good hammer Wire brushes
wire wheels Sandpaper
regular pliers Electric Drill
razor knife Scissors
ruler
Paint Scraper
Putty Knife
Sander
Keep in mind when removing nails that they are "clinched" over on the inside of the trunk and can be quite hard to get out. Lift
the head of the nail and pull out with the pliers. Sometimes it is best to find the "clinched" end and nip it off with pliers before
using the tack lifter to pry the head of the trunk nail up. Then the end nipper pliers can be used to pull the nail out. This will
ensure minimal wood damage as the nail comes out. Do not keep the nails, they will be replaced.
3) tin, rust and other bothersome things -
Flat and Embossed tin that is rusted can be refurbished in several ways: Wire wheels on an electric drill, Sandpaper, wire
brushes, etc. followed by steel wool. If the rust is only in small areas on flat tin and corners etc. it is best to just remove the
surface rust to a matte finished steel appearance with the above mentioned tools and paint on a clear coat to protect it.
If your tin looks like it has been submerged in water for a while you might want to consider other more drastic measures. A
product that is found in Auto parts stores called EXTEND RUST TREATMENT is useful to kill off rust and turn it into a black
paint ready surface. After treating rusty tin with EXTEND prime paint with any primer made for steel and then paint satin black.
Any flat tin that is rusted through will need to be replaced with new tin or aluminum sheet metal. Just cut to fit and nail on. After
priming and painting it will not be noticed. Embossed tin that is damaged or rusted beyond recognition can be replaced also,
however, the pattern might be hard to match.
4) wood slats -
wood slats can be stripped if painted or cleaned with furniture refinisher. In a best case scenario you can just clean with
Murphy's Oil soap , sand, and re-coat with tung oil or top coat of your choice. If you do refinish the wood slats, use an oil stain
such as Watco Danish Oil and follow with an oil based top coat. The oil based products will add oils to the wood surface and
rejuvenate the hidden patina.
5) Canvas coverings -
Canvas covered trunks originally had paint applied to make them somewhat water resistant. If you are lucky enough to have a
canvas covered trunk that has canvas still intact and repairable it can be glued back down in any areas that are loose with
common white (Elmer's) glue and weighted to clamp down flat. After being cleaned and re-glued the canvas can be repainted
or just preserved with a clear coat such as Water base polyurethane.
In the event that the canvas is too far gone to be repaired, the trunk can be stripped of all its canvas and new canvas applied
using the old canvas pieces as patterns for the new. This will require more removal of items that are on top of the canvas, (
slats, tin, metal corner clamps, etc.) Apply with Elmer's glue and after dry seal with a water based polyurethane to make the
surface more soil resistant. New canvas can also be painted a color of your choice.
6 ) Finishing Embossed tin and leather -
Embossed tin was originally painted in two colors. When restoring a trunk there are several ways to refinish the patterned tin.
1) Sandpaper or wire brush (or use paint remover) the tin down to bare metal and clear coat with Tung oil, shellac, or any
oil based sealer.
2) Sandpaper or wire brush the tin and paint with a gloss or satin black paint. After the paint is dry carefully sand the paint
off of the raised areas of the embossing to reveal the bare metal. Last, clear coat the tin to add protection from rusting.
3) Repaint in two colors to reproduce the original look of the embossing. First remove any rust or loose paint from the tin.
Prime with a good primer. Select an OIL Based paint and paint the embossed tin all over. This color will be the color of the
raised areas of the embossing. Allow at least 36 hrs to dry.
Select a color of Water based paint for the recessed areas. Before starting to paint have a container of water, kitchen cleaning
sponge, and a roll of paper towels ready. Working with a small area quickly paint the water based color over the oil based
color making sure to get the recessed areas covered completely. Wrap a paper towel around the wet and wrung out sponge.
Gently wipe over the embossed tin that you just painted and remove the color from only the raised areas. Use a light touch
and wipe the water base color off until the raised areas are completely clean and the recessed areas are still covered . I f you
do not like the way the panel turns out, use water to remove the paint and start over. Once you have the proper look to the
embossed tin, let the paint dry for 24 hrs.
A product called Oop's Latex paint remover or Goof Off can be used then to remove any troublesome areas and add final
touches. Wrap a paper towel around your finger and dampen with the Oop's liquid and rub lightly to sharpen up the detail
between the 2 colors.
4) Leather covered trunks are easy to restore if the leather is not too dried out and crumbly. Use a Saddle soap and soft
cloth to clean the leather and Neetsfoot oil to restore the suppleness and add color back to the leather. Any loose areas can be
re-glued with white glue or hide glue and weighted down to clamp tight until the glue sets. Small areas of missing leather are
best left alone as it will always look Patched if you try to add new leather to a 100 year old trunk.
7) Renailing the trunk-
The trunk should have all the existing nails tightened to make the trunk box more solid and not wobbly. To do this you will need
a good hammer, and a steel heel to hold inside the trunk where the nail came through the wood. Hammer the trunk nail from
the outside and hold the steel heel against the wood on the inside. It helps to have a helper hold things for you at times. Any
nails that are replaced have to be hammered in this way also so that the nail curls over on the inside of the trunk and is tightly
holding the handles, tin, etc. on the outside. While you are re-nailing you might as well install the new leather handles,
ornamentation, handle loops, removed corners, locks, hinges,bottom studs, etc. A steel auto body work dolly will work really
well for use as the heel to hold inside the trunk and hammer against.
8) Installing new leather handles- Usually the foot print of the old handles and caps will be visible on the side of the trunk to
use as a guide. Drill or punch 2 small holes in each end of the handle. These holes will be where nails will go through to
attach the handle to the trunk. Bend the handle into a curved shape with the ends flat against the trunk. When sure of the
correct placement nail the handle on through the holes previously drilled. The nails should go through to the inside of the trunk
at least 1/4" . Nail both handles on this way. Place a handle cap over each handle end and nail on with 3 nails each. Handle
caps are decorative only, they do not hold the handle on.
Handle loops with a pin are used with slotted handles and work similar. These pieces of hardware hold the handle on with a
pin in the hardware and handles are not nailed on.
9) Musty mothball odors, holes, gaps, etc.-
Musty odors inside a trunk are easily removed when the lining paper is removed, and the inside washed down with a solution
of detergent and water or ammonia and water. After the inside is dry, if any odor remains set the opened trunk in the sun for a
few days, after it is completely dry, seal the inside wood with shellac or similar sealer.
Gaps in the wood are caused by the wood drying out and absorbing moisture many times over the last 100 yrs. The wood
case has come into equilibrium with the cycle and the restraints of the outside tin, etc. Be very careful if you try to close the
gaps with glue and clamps to prevent undue stress on the case. Holes from loosened knots and other causes can be
patched with wood fillers and other compounds. On occasion an area of the wood will have to be replaced completely. Saw
out square and glue in a repair the same thickness as the existing wood.
10) Relining the inside
Relining of a trunk will add a clean surface to the inside and finish off the trunk for use as a blanket chest, etc. Any number of
materials can be used to reline but plain paper, decorative paper, wallpaper, fabric, and cedar paneling are the usual choices.
First scrape the old paper out with a paint scraper. It helps to wet the old paper down with a spray bottle and vinegar/water.
Next if there are any gaps running the length of the trunk, glue down a 1-1/2" strip of thin fabric material over them. Linen fabric
works well for this.
If you choose wallpaper, save yourself a lot of bother and try not to use solid vinyl paper. It is difficult to work with and because
of the many lap joints is difficult to get to stay glued in the corners. Try to reline with thin vinyl coated wallpaper or plain paper
wallpaper instead.
The procedure is: cut each piece to fit with 1/2" extra at the corners and reline: the ends - first, front and back - second,
bottom/top - last. Make sure the wood on the inside of the trunk is sealed and use white glue to paste it in.
Plain paper is my choice for relining. I use unprinted china wrapping paper and age (antique) the paper after it drys with a tea
stain. Use the same procedure as with wallpaper. A hot air blower is necessary to dry and shrink the paper to wrinkle free
condition.
You may also re-line a trunk with cloth material. When lining in cloth be sure to glue the cloth to a poster board backer first
before gluing into the trunk. Cut the poster board to size for each surface before gluing on the cloth, then glue the poster
board/cloth assembly into the trunk. Use 3M spray contact glue for this.
If you are good at wood working and don't mind the added weight of cedar try lining the trunk with cedar paneling. You can find
cedar paneling at almost any Home Improvement store in a bundle. It is the same material used to line your clothes closet.
Keep in mind that if your trunk has a tray and you reline completely in cedar, the tray will not fit any longer because the cedar
will make the trunk smaller on the inside. Find a good woodworker to reduce the size of the tray so that it fits inside your trunk
again.
Any trays should be relined completely with plain paper or fabric along with the inside of the trunk.
Remember to have fun and not to rush, give things time to dry completely before moving on to the next phase and if you just
can't seem to get it finished, we are always here to help or complete your restoration!
Gary Daniel
Shenandoah Antique Restoration Email: info@shenandoahrestoration.com
800-575-1960
Shenandoah Antique Restoration
Helpful hints and trunk tricks of the trade
Helpful hints and trunk tricks of the trade
Tack lifter
End nipper pliers
| Order our New Catalog and Price List. Complete listing of: Furniture, Hoosier Cabinet, Trunk, Telephone, Chair Caning, Wood Parts/Veneer, Oil Lamp Hardware, Refinishing Aids, Supplies, and Chemicals. Over 2,000 items $7.00 each |

Steel heel dolly
Phone: 800-575-1960
580-951-0234
580-951-0234